


Piano lesson webcam: best setups for teachers

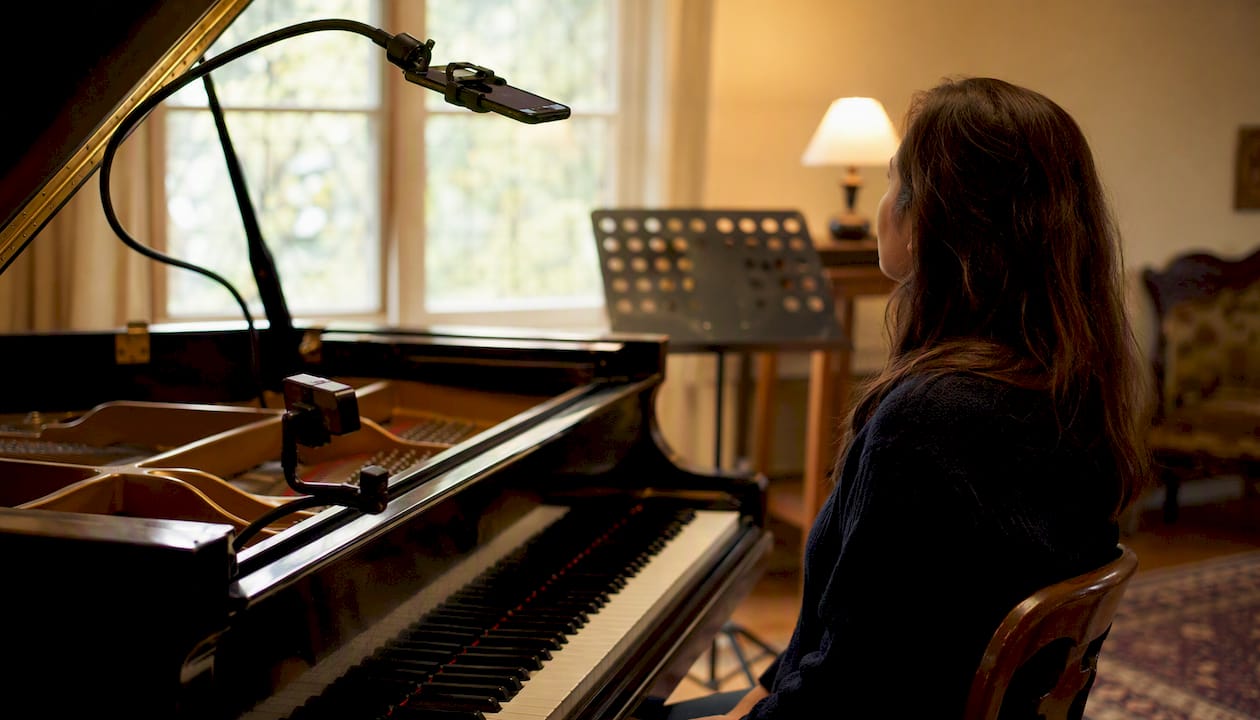
For most piano lessons online, a profile-facing webcam at keyboard height paired with a smartphone overhead gives teachers everything they need to see: wrists, forearms, hand shape, and key contact. The Logitech C920 covers the profile view reliably at a budget-friendly price, and a smartphone on a flexible mount handles the overhead angle for nothing extra.
Right now, do these three things:
Buy or borrow a Logitech C920 (or Logitech Brio if budget allows) and position it at the side of the keyboard, roughly at elbow height.
Clip a smartphone to a music-rack mount or a flexible gorillapod above the keys for a top-down view.
Open Zoom on the desktop app, enable Original Sound for Musicians under audio settings, and run a five-minute test recording before the first lesson.
Pro Tip: Run a local Zoom recording before any lesson. Watch it back at 1.5× speed: if you cannot clearly see the student’s knuckles and wrist angle, adjust the camera height before the session begins.
Key takeaways
The single most important step for any piano lesson webcam setup is positioning the camera at the side of the keyboard so the teacher can clearly see the student’s hands, wrists, and forearms.
Point | Details |
Profile view is the priority | Position the webcam at keyboard height on the side; tops of hands and wrists must be fully visible. |
Logitech C920 for most budgets | At under £80, it covers profile and overhead use with broad Zoom and OBS compatibility. |
Enable Original Sound in Zoom | Disable noise suppression in Zoom’s advanced audio settings to preserve piano tone and dynamics. |
Add a smartphone overhead | A modern smartphone on a gorillapod gives a top-down key view at no extra cost. |
Danpianostudio online lessons | Fully configured webcam setup and tailored tuition available for all levels via online lesson booking. |
Table of Contents
Which webcam should you use for piano lessons?
The table below covers the cameras most commonly used for virtual piano instruction, matched to the scenarios where each earns its place.
Logitech Brio is the strongest all-round choice for teachers who want a single camera that handles a dimly lit room and still delivers sharp hand detail. The Logitech C920 is recommended by several piano teachers as the most practical budget option, and that reputation is well-earned: it autofocuses quickly, works on every major platform without drivers, and costs less than a single lesson pack.
Elgato Facecam Pro suits teachers who already run a streaming-grade setup or who record lessons for student review. Its large sensor handles mixed lighting well, and the Elgato 4K Capture Utility gives granular control over exposure and white balance that Zoom’s own settings cannot match. The trade-off is price: at £200 or more, it is harder to justify unless video quality is a genuine priority.
Logitech C920 deserves a second mention on its own terms. It captures a seated pianist’s upper body and hands in a single frame without distortion. It is the camera most UK teachers reach for first, and for good reason.
A smartphone as a secondary camera is underrated. Modern iOS and Android devices shoot sharper close-ups than most dedicated webcams, and apps such as Camo (iOS/macOS) or DroidCam (Android/Windows) feed the phone’s camera directly into Zoom as a virtual device. Overhead smartphone mounts are a low-cost solution that many teachers already have at home.
How to choose the right webcam for piano lessons
The criteria that matter for a piano lesson webcam differ from those for a video call or a gaming stream. Here is what to weigh, in order of practical importance.
Field of view (FOV). A 70–90° FOV captures a seated player from the waist up without the fish-eye distortion that wider lenses introduce. Anything narrower than 65° forces you to sit further back, which reduces hand detail.
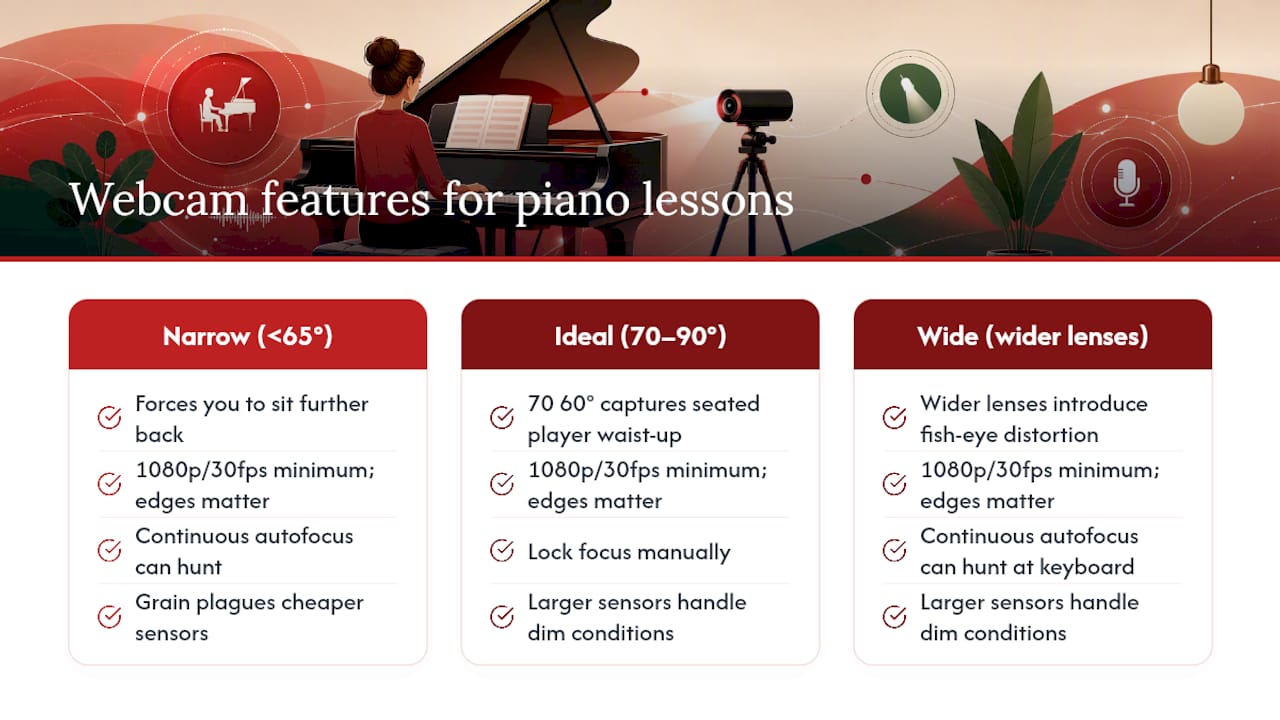
Resolution and frame rate. 1080p/30fps is the minimum worth buying in 2026. Higher frame rates (60fps) matter less for piano than for fast-moving sports; what matters more is sharpness at the edges of the frame, where fingers sit.
Autofocus behaviour. Continuous autofocus is useful for face shots but can hunt annoyingly when the camera is pointed at a static keyboard. Look for cameras that let you lock focus manually, or simply tape a small piece of paper to the focus ring if the lens allows it.
Low-light performance. Most home practice rooms are not well lit. Cameras with larger sensors (the Elgato Facecam Pro, the Logitech Brio) handle dim conditions without the grain that plagues cheaper sensors.
Latency and USB connectivity. USB-A or USB-C plug-and-play cameras with UVC (USB Video Class) support need no drivers and introduce minimal latency. Avoid cameras that require proprietary software to function at all.
Software compatibility. Every camera in the shortlist above works with Zoom, OBS Studio, and ManyCam on both Windows and macOS. Check that macOS camera permissions are granted in System Settings > Privacy & Security before the first lesson.
Budget guidance for UK teachers and students
Under £80: Logitech C920. Covers profile and overhead use, works immediately, and is widely available from Argos, Amazon UK, and John Lewis.
£80–£150: Logitech Brio (often on sale in this range). The step up in low-light performance is noticeable in a typical home practice room.
£150–£230: Elgato Facecam Pro. Worth it for teachers who record lessons or stream recitals.
Accessibility and privacy
For students with hearing impairments, Zoom’s live captions (powered by its built-in transcription) can run alongside the lesson without additional software. A physical camera cover or a privacy shutter is worth fitting to any webcam that stays plugged in permanently. For background, a plain wall or a simple virtual background in Zoom removes visual distractions without requiring a green screen.
How should you position cameras for the clearest view?
Camera angle is where most online piano lessons fall short. A webcam pointed at a student’s face tells a teacher almost nothing about technique.
Profile (side) view
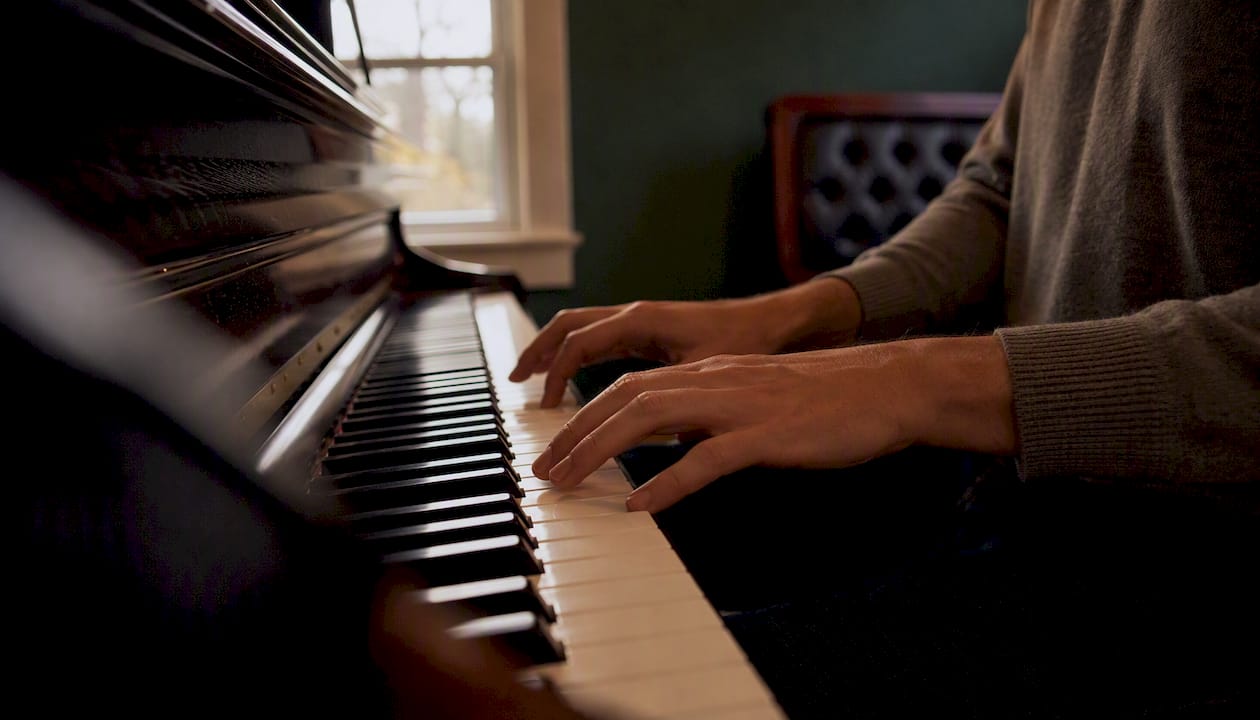
Position the camera at the side of the piano, roughly level with the keyboard surface or slightly above elbow height. The frame should show the full keyboard from roughly middle C outward, the player’s hands, wrists, and forearms, and enough of the torso to assess posture. The tops of the hands must be visible: seeing the tops of students’ hands is the primary framing priority for any technique correction. Avoid zooming in so tightly that the wrist disappears off the bottom of the frame.
Overhead (keyboard) view
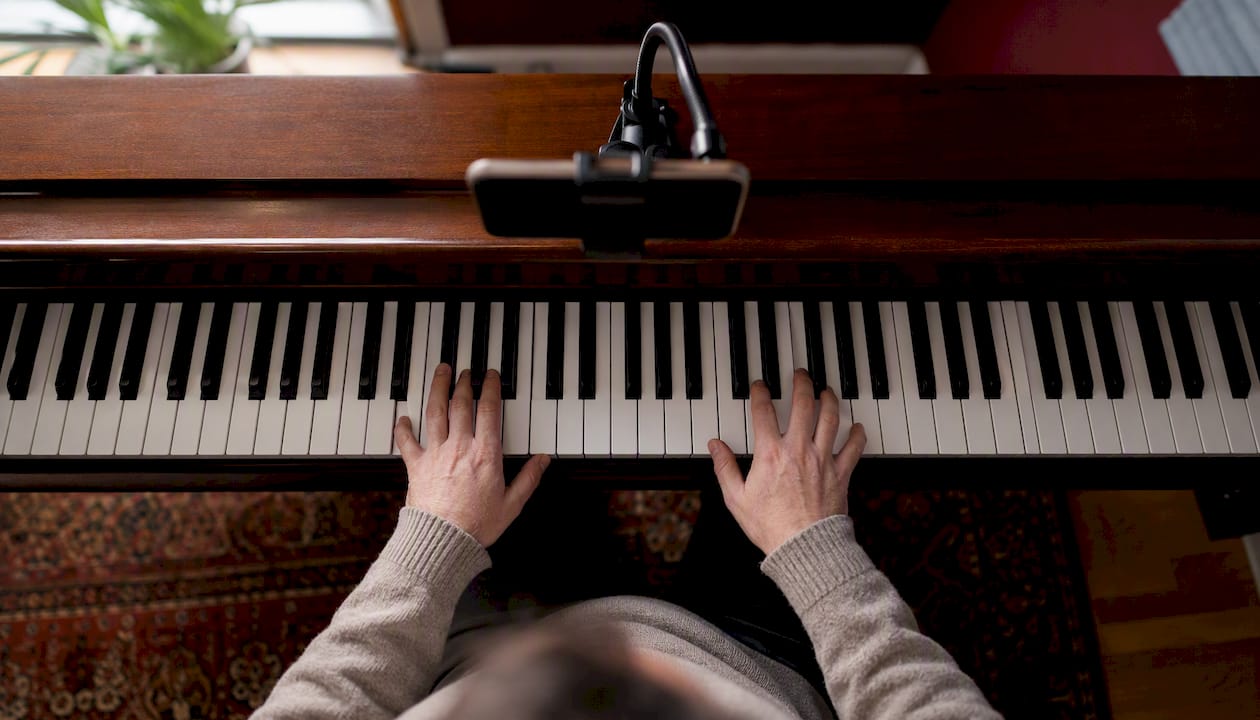
A top-down camera reveals which fingers are playing which keys, fingering choices, and thumb-under technique. Mount a smartphone or a second webcam directly above the keyboard using a boom arm or a gorillapod clamped to the music rack. Practical mounting adapters and flexible arms make this achievable without drilling or adhesives. The frame should show roughly two octaves centred on the passage being worked on.
Face/front view
A front-facing camera on the music rack lets the student watch the teacher’s face and expression without turning away from the keys. This matters most during sight-reading and ensemble work, where eye contact and cuing are part of the lesson. Keep it at eye level and slightly above the music stand so it does not block the score.
If you can only use one camera, choose the profile view. It is the single most diagnostically useful angle for assessing posture, arm weight, wrist alignment, and hand shape. The LCME piano curriculum identifies early correction of posture and technique habits as foundational, and you cannot correct what you cannot see from the side.
Simple lighting fixes that make hands visible on camera
Lighting is the fastest, cheapest improvement most teachers and students can make. A £15 LED desk lamp repositioned correctly does more for image quality than upgrading from a C920 to a Brio.
Quick checklist:
Place a soft light source above and slightly in front of the keyboard, angled downward at roughly 45°. This reveals the texture of the keys and the shape of the hand without casting harsh shadows.
Avoid sitting with a window directly behind you. Backlight silhouettes the player and forces the camera to underexpose the hands.
Use daylight-temperature bulbs (5000–6500K) rather than warm household bulbs. Warm light makes white keys look yellow and reduces contrast between the hand and the keys.
On glossy black keys, position the light slightly to one side to avoid a direct specular reflection that washes out detail.
Natural light from a north-facing window is ideal: soft, diffuse, and consistent. Schedule lessons in the morning if the room has east-facing windows, or in the afternoon for west-facing rooms.
Budget LED panel lights (such as the Elgato Key Light Air or cheaper equivalents from Amazon UK) clip to a desk and offer adjustable colour temperature and brightness. They are not necessary, but they help improve lighting setup.
Why audio matters more than you might expect for piano lessons
A teacher can tolerate a slightly soft image. A student cannot learn from a piano sound that has been compressed, filtered, or cut by noise suppression. Audio fidelity is not a luxury for piano lessons; it is the medium through which most musical correction happens.
Zoom’s default noise suppression is aggressive. It targets non-speech sounds, which means it actively attenuates piano tone, cuts attack transients, and can make a fortissimo chord sound like a muffled thump. Disabling it is non-negotiable.
Practical microphone options
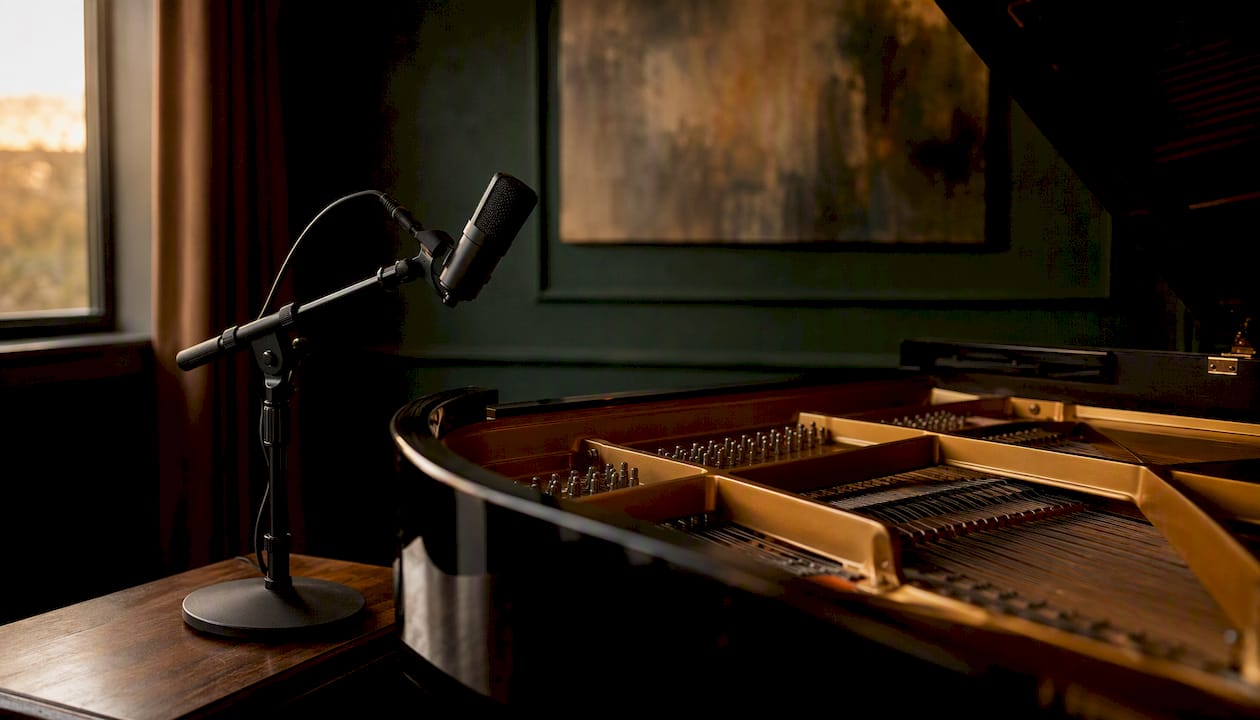
USB condenser microphones (such as the Blue Yeti, Audio-Technica AT2020USB+, or Rode NT-USB Mini) capture a wide frequency range and plug directly into a laptop or desktop. For an upright piano, place the mic roughly 30–60cm from the soundboard, slightly above the keyboard level and angled toward the upper strings. For a grand, position it above the open lid, pointing inward.
Clip-on lavalier microphones are convenient for teachers who move around during demonstrations but sacrifice low-frequency piano resonance. They work well for voice but are a compromise for instrument capture.
A good headset (such as the Jabra Evolve2 or a Plantronics Blackwire series) is the lowest-friction option for students who primarily need to hear the teacher clearly and do not need to transmit high-quality piano sound themselves.
Pro Tip: Avoid placing a USB microphone on the same surface as the piano. Vibration from the instrument travels through the desk and causes a low rumble in the recording. Use a small mic stand or a stack of books to decouple it.
Zoom settings and camera-switching tools for multi-angle lessons
Getting the software right takes fifteen minutes and saves hours of frustration across a term.
Enabling original sound in Zoom
Open the Zoom desktop app (not the browser version, which lacks full audio controls).
Go to Settings > Audio > Advanced.
Set Suppress background noise to Disable.
Tick Show in-meeting option to “Enable Original Sound”.
At the start of each lesson, click Original Sound: On in the top-left corner of the meeting window.
This preserves piano dynamics and attack. Using the desktop Zoom app is essential for accessing these controls; the mobile and browser versions do not expose them.
Switching cameras with ManyCam or OBS Studio
The Philadelphia Piano Institute uses Zoom alongside ManyCam to present multiple camera angles in live lessons. The workflow is straightforward:
Install ManyCam or OBS Studio and add each camera source (profile webcam, overhead smartphone via Camo/DroidCam) as a separate video source.
In ManyCam, assign each source to a preset. In OBS, create a separate Scene for each angle and enable the OBS Virtual Camera output.
In Zoom’s video settings, select ManyCam Virtual Webcam or OBS Virtual Camera as the camera source.
Switch angles during the lesson by clicking the preset in ManyCam or pressing a Scene hotkey in OBS.
Common troubleshooting
Virtual camera not visible in Zoom: on macOS, grant camera permissions to ManyCam or OBS in System Settings > Privacy & Security > Camera, then restart Zoom.
Driver conflict on Windows: unplug all cameras, uninstall manufacturer software, reconnect one at a time.
Audio and video out of sync: lower the Zoom video resolution to 720p and check that no other application is using the microphone simultaneously.
A virtual piano lesson guide covers additional workflow steps for teachers running regular online sessions.
Tripods, clamps, and boom arms that work safely with pianos
The right mount keeps the camera stable, protects the piano’s finish, and makes angle changes quick enough to do mid-lesson.
Recommended mounting options:
Freestanding tripod with a boom arm extension: the most versatile option for any piano type. Position the tripod beside the piano and extend the boom arm over the keyboard for an overhead view. No contact with the instrument.
Music-rack clamp mount: a small ball-head clamp (such as the Joby GorillaPod Magnetic or a generic music-stand clamp) attaches to the music rack and holds a smartphone or lightweight webcam for a front-facing or slight overhead angle. Pad the clamp jaws with felt or rubber to protect the rack finish.
Gorillapod flexible tripod: wraps around a music stand, a lamp, or a shelf bracket. Ideal for smartphones used as secondary cameras. Flexible mounts let teachers switch rapidly between overhead and profile views without repositioning a full tripod.
Desk clamp with articulating arm: clamps to a nearby table or shelf and extends over the keyboard. Keeps the floor clear and is easy to reposition.
Safety rules: never use adhesive mounts, suction cups, or tape directly on a lacquered piano surface. Distribute the weight of any overhead rig so it cannot tip. For grand pianos, avoid resting anything on the open lid.
Pro Tip: Label each camera’s USB cable with a small piece of coloured tape matching its Zoom/OBS source name. When you are switching angles mid-lesson, you will not unplug the wrong camera.
For cable management, a few Velcro cable ties routed along the tripod leg and under the keyboard bench keep the floor clear and prevent trip hazards during lessons.
Pre-lesson test checklist and fixes for common webcam problems
Run this before every lesson, not just the first one. Five minutes of testing prevents twenty minutes of mid-lesson troubleshooting.
Run a speed test (fast.com or Speedtest.net). A stable internet connection is essential for good video quality in Zoom; slower connections may require reducing video resolution in settings.
Check camera framing. Open Zoom’s video preview and confirm the profile view shows hands, wrists, and forearms. Adjust height if the wrists are cut off at the bottom.
Confirm Original Sound is active. The Original Sound: On button should be visible and enabled in the top-left corner of the Zoom meeting window.
Test the microphone. Use Zoom’s built-in mic test (Settings > Audio > Test Mic). Listen for background hum or room resonance and reposition the mic if needed.
Update camera drivers and Zoom. Outdated drivers are the most common cause of dropped frames and virtual camera failures.
Record a 60-second local test. Play a short passage and watch the recording back. Check for audio lag, frame drops, and whether the camera angle captures what you need.
Troubleshooting quick reference
Poor image quality: check that Zoom’s HD video option is enabled (Settings > Video > Enable HD). If bandwidth is the constraint, close all other browser tabs and streaming apps.
Audio dropouts: switch from Wi-Fi to a wired Ethernet connection. If that is not possible, move the router closer or use a powerline adapter.
Persistent lag between audio and video: lower the audio sample rate in Zoom’s advanced audio settings from 48kHz to 44.1kHz, and reduce video resolution to 720p.
For exam preparation specifically, a pre-exam checklist covers the additional technical checks worth running before an ABRSM online assessment.
Teacher-tested setups used at Dan Piano Studio
These three configurations cover the range from a first-time online teacher to a fully equipped home studio.
Setup A: single camera, low cost
Kit: Logitech C920, standard tripod, desk lamp with daylight bulb, laptop built-in mic or USB headset.
Lessons run with the C920 in profile view at keyboard height. The teacher sees hands and wrists clearly enough for most technique corrections. Audio comes from the laptop mic or a basic headset. Total outlay: under £100 including the tripod.
Pros: quick to set up, no software beyond Zoom, works on any laptop. Cons: no overhead view; the teacher cannot see which specific keys are being played during complex passages.
Setup B: two-camera hybrid
Kit: Logitech C920 or Brio (profile), smartphone on a gorillapod (overhead), ManyCam or OBS for switching, external USB mic.
The profile camera runs as the primary Zoom source via ManyCam. The overhead smartphone feeds in as a second source. The teacher switches to the overhead view when checking fingering or working on a specific passage, then returns to the profile view for posture and arm-weight corrections. This multi-angle approach replicates the most useful elements of in-person teaching and suits exam preparation work where fingering precision matters.
Pros: covers both technique and key-specific detail; the smartphone costs nothing extra. Cons: requires fifteen minutes of software setup and a slightly faster internet connection.
Setup C: studio-style
Kit: Logitech Brio or Elgato Facecam Pro (profile), second webcam or smartphone (overhead), USB condenser mic, LED panel light, boom arm and desk clamp mounts, OBS Studio for full scene control.
This is the configuration Danpianostudio uses for recorded lesson content and higher-stakes sessions. OBS manages scene switching, the condenser mic captures piano tone accurately, and the LED panel provides consistent lighting regardless of the time of day. Lessons can be recorded locally in OBS for student review, which improves feedback loops and pupil retention. The LCME piano curriculum emphasises early correction of technique habits. This setup gives the teacher the visual and audio resolution to catch problems that a single webcam would miss.
Pros: professional image and audio quality, full recording capability, consistent results. Cons: higher upfront cost (£300–£500 for the full kit) and a longer setup time.
For teachers new to online lessons, the guide to online piano lessons that work covers syllabus alignment and lesson structure alongside the technical setup.
What actually matters for webcam piano lessons
The camera you choose matters far less than where you put it. Teachers who spend £200 on a Brio and then point it at their face are getting less useful information than a teacher with a £60 C920 positioned correctly at the side of the keyboard.
Audio is the second underestimated variable. A student who cannot hear the difference between a teacher’s legato and staccato demonstration is not learning from the lesson; they are watching a silent film with subtitles. Enabling Original Sound in Zoom and placing a decent microphone near the piano soundboard costs almost nothing and changes the lesson completely.
The third thing teachers consistently underestimate is consistency. A setup that takes twenty minutes to reassemble before each lesson will eventually not get reassembled. Leave the camera on its tripod, leave the mic plugged in, and leave Zoom’s audio settings saved. The best setup is the one you actually use every time.
Exam preparation and technique work are fully teachable online when the camera angle is right. The ABRSM and Trinity boards have clear guidance on remote assessment requirements, and students who have been taught with good camera discipline throughout their lessons arrive at online exams already comfortable with the format.
Danpianostudio’s online piano lessons: a different route to the same goal
There are practical routes to better online piano lessons: buying the right webcam, configuring Zoom correctly, and building a two-camera rig. All of that is worth doing. But the technology only works when the teaching behind it is strong.
Danpianostudio offers online piano lessons for children and adults at all levels, from complete beginners to students preparing for ABRSM and Trinity exams. Every lesson is tailored to the individual student, covering classical piano, jazz, improvisation, and music theory in a structured, encouraging environment. The studio’s setup, described in the sections above, is already configured for clear hand and technique visibility, so students get the full benefit of webcam teaching from the first session. To book a trial lesson or ask about availability, visit the online lesson page.
Sources
Recommended


Comments